You can upload your own data to your ZDOS via the CSV uploader. Learn how here!
Note:
The CSV uploader feature is only available to partners on a standard or enterprise level package.
SEE THE TIPS & HINTS AT THE END OF THIS ARTICLE FOR DETAILS ON BEST PRACTICES FOR FORMATTING YOUR CSV FILES
Do you have data that you collect locally that you would like to see in your ZDOS? Many destinations have a variety of data that is custom and specific to their location (i.e. visitor center guest log, survey data, resident sentiment, visitor profile studies) that is valuable to see and combine with other data sets Zartico provides in the ZDOS. This is possible using the CSV uploader feature!
A caution on privacy: We take privacy very seriously. Please do not upload any personally identifiable information, including names or email addresses of individuals. If you upload personally identifiable information, it will be in violation of your contract with Zartico.
What is CSV uploader?
The CSV uploader is a powerful tool that lets you harness all the functionality of the Analytic Designer with your own datasets. You can upload data, create insights, and then create your own modules. You can bring in any data on any topic, provided the data is in CSV format.
What happens to this information when I upload a CSV file?
The structure of a CSV file imports into ZDOS as a dataset. After you upload the CSV file, you will have the opportunity to use the data in the analyze section of your ZDOS.
How do I upload a CSV file?
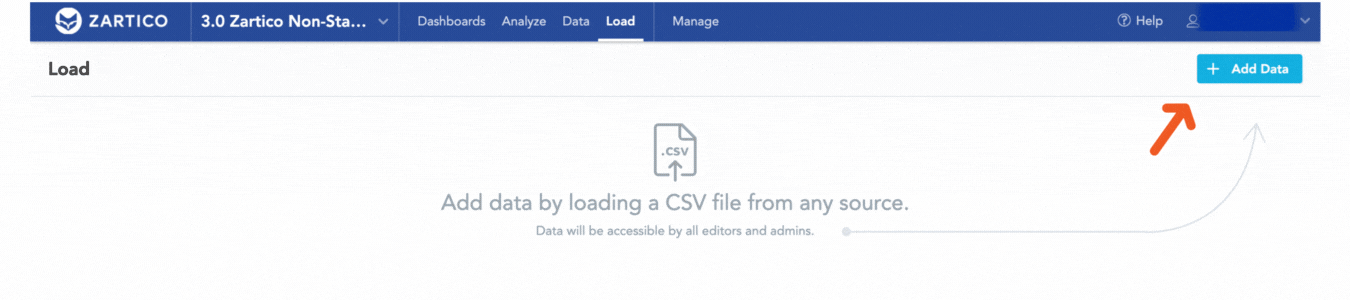
Step 1: Click on the "Load" tab at the top of your ZDOS
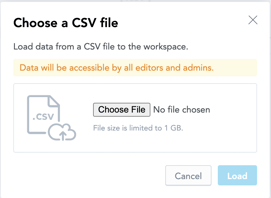
Step 2: Click Add Data. The dialog for choosing a CSV file appears.
Step 3: Click Browse to select the CSV file and click Load to start data processing.
Notes on files:
- Only files with at least one numerical column are supported.
-
Files must be smaller than 1 GB.
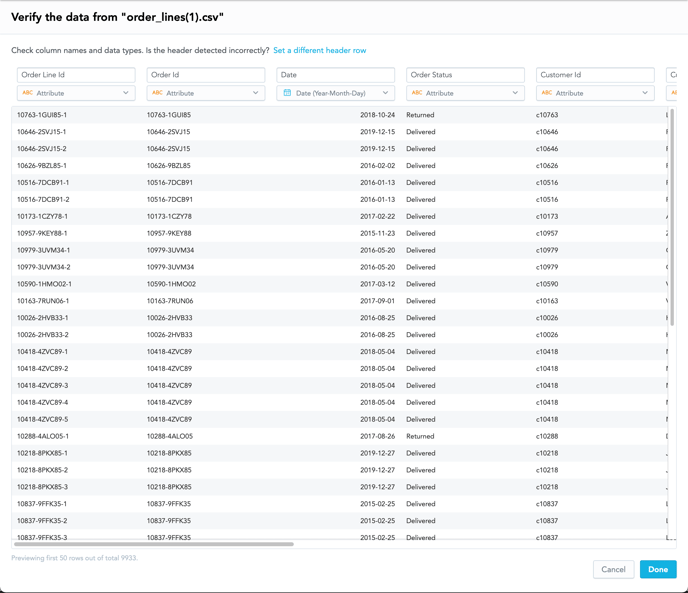
Step 4: On the screen that appears, verify the data, then click Done.
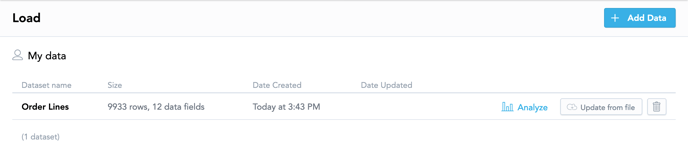
This page confirms your upload. You should see your dataset in this list of “Dataset Names”. You can click the usual “Analyze”, or else hit the “Start Analyzing” link in the green success message.
Step 5: Click on Analyze to explore your new data in charts.
You will now see the sample data in your data set list in Analyze.
Once the data is uploaded, in the upper left in the Analytic Designer, you can choose between “Production Data” (the Zartico LDM data), “My Data” (any datasets that you’ve uploaded), and “Other Users' Data” (datasets uploaded by other users in your workspace).
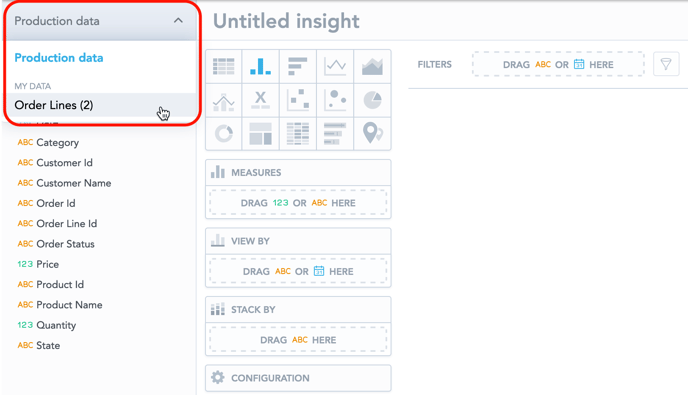
Click on your dataset, and all of the facts and attributes will be listed, like our standard Zartico datasets.
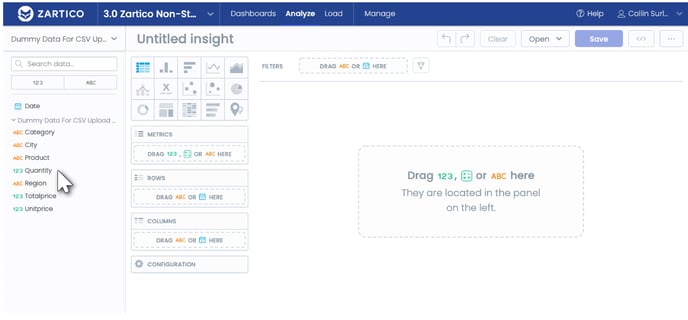
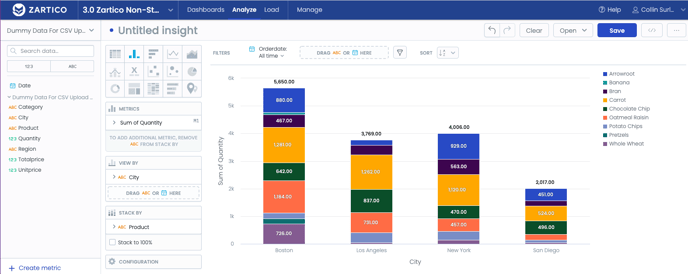
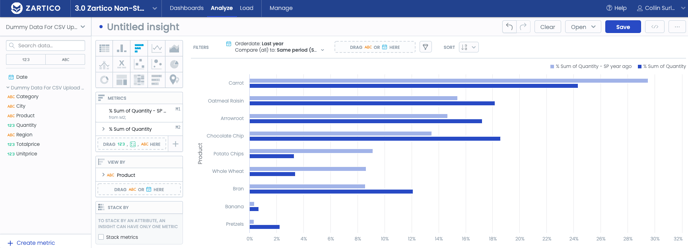
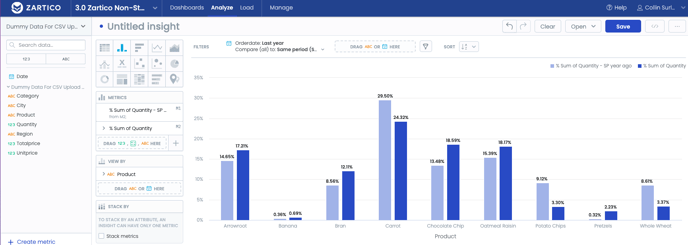
Now you can create insights!
Note: You will have unlimited access to create your own charts and connection with other standard data sets within the analyze feature only. We cannot bring these insights into your modules or provide support to these datasets or insights.
Tips & Tricks - CSV Uploader
Column Naming:
- Instead of spaces, use underscores (_). This will render as a space in the CSV Uploader.
Data Inputs:
- If you want the data to be entered in as a Fact (ie something that can be summed or averaged) versus an Attribute (ie something you can filter the data by) it HAS to be a numeric value. If there are commas or any non numeric values in these columns, your only option will be Attribute instead of Fact.
- To have your dates (if you want to look at the data by month or day of the month) best align with Zartico date functions in the ZDOS we recommend using the YEAR - MONTH - DATE format for dates (ex: 2022-09-29)
- If you want to look at the data by year, all you need to include is the year (ex 2019)
- If you have a recurring report, you will be able to reupload the data into the same data stream. It rewrites over the entire file, so do not remove any historical data, just add to the bottom.
Getting to the Data:
- In Analyze, under the Zartico on the far left top, there is “Production”. This is all data that comes through the Zartico feed. Go to the carrot and drop down to any specific data sets that you have loaded.
- You can also get to the data from the Load tab, selecting “Analyze” next to the data set.
Manage Uploaded CSV Files
To update or delete data uploaded from a CSV file, review the CSV files under the My data section.
To learn more about how to use the Analyze feature, you can watch this webinar on Analyze or read our Article on How to Customize your Insights Charts in Analyze.
Need more help? Talk to a real human.